
Brandle has two different types of general Users that you can assign to team members: Administrators (all access), and View-Only User. There is also an option to create your own Team Roles and set specific permissions for each role. It is beneficial to think about whether you need to give the same permissions to a type of role vs. individual permissions per person. It is best to define when and why a role is selected and operate with consistency. For example, we recommend that only an Administrator have the ability to create and change Tag Categories and Tags (for consistency), and you may want to apply other restrictions on different roles performing governance.
You access the roles on the Account tab. The Team sub-tab is where you invite new users and apply the user roles to the individual. The Team Roles is where you create new roles such as Brand Manager, Social Media Manager, Agency, etc.
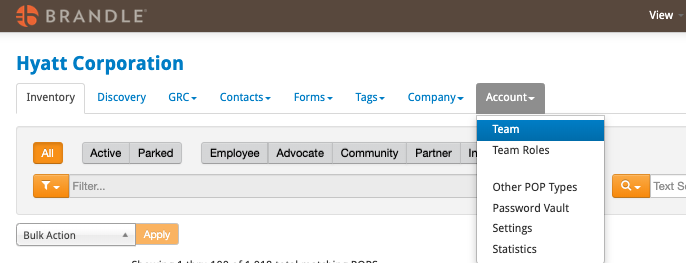
Create Custom Team Roles
The Team Roles was created so that you can invite any corporate stakeholder into your Brandle entity account as a role or type of account, and set specific permissions for what that role can (and can't) perform within the system. It's easy. It's fast. And it gives the Administrator better control of data when you have a diverse Account Team accessing your Brandle entity account. Here's how it works:
Go to your Account Tab and select the Team Roles sub-tab. Here is what this looks like:
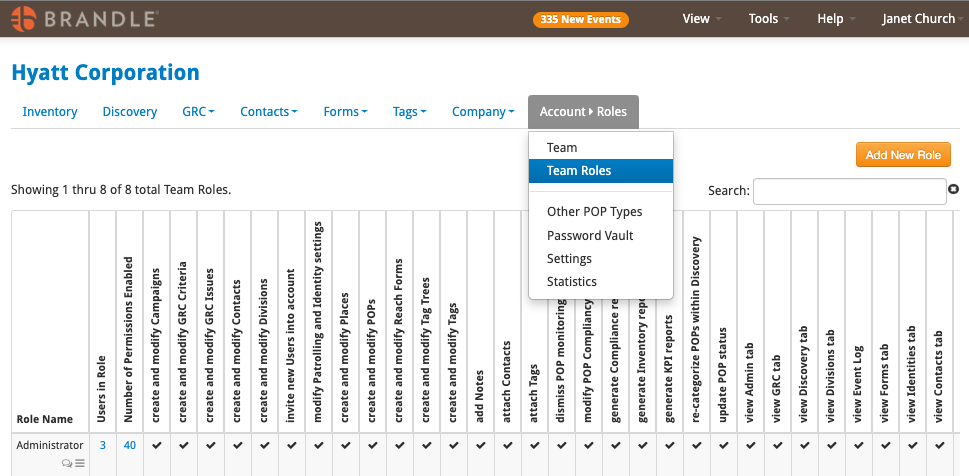
The first Role stated is the Administrator role with all Permissions checked on. To change Administrator Permissions, just click the 3-bard Action Menu within the Administrator cell. We recommend that Administrators keep all Permissions, but you do have this flexibility.
To create a new Role with New Permissions, click the orange button Add New Role. The following dialog box will present with a blank Role Name and the different email notification options for everyone assigned this role. Remember, that this process sets a users email notifications; the user can't change the emails that an Administrator has assigned.
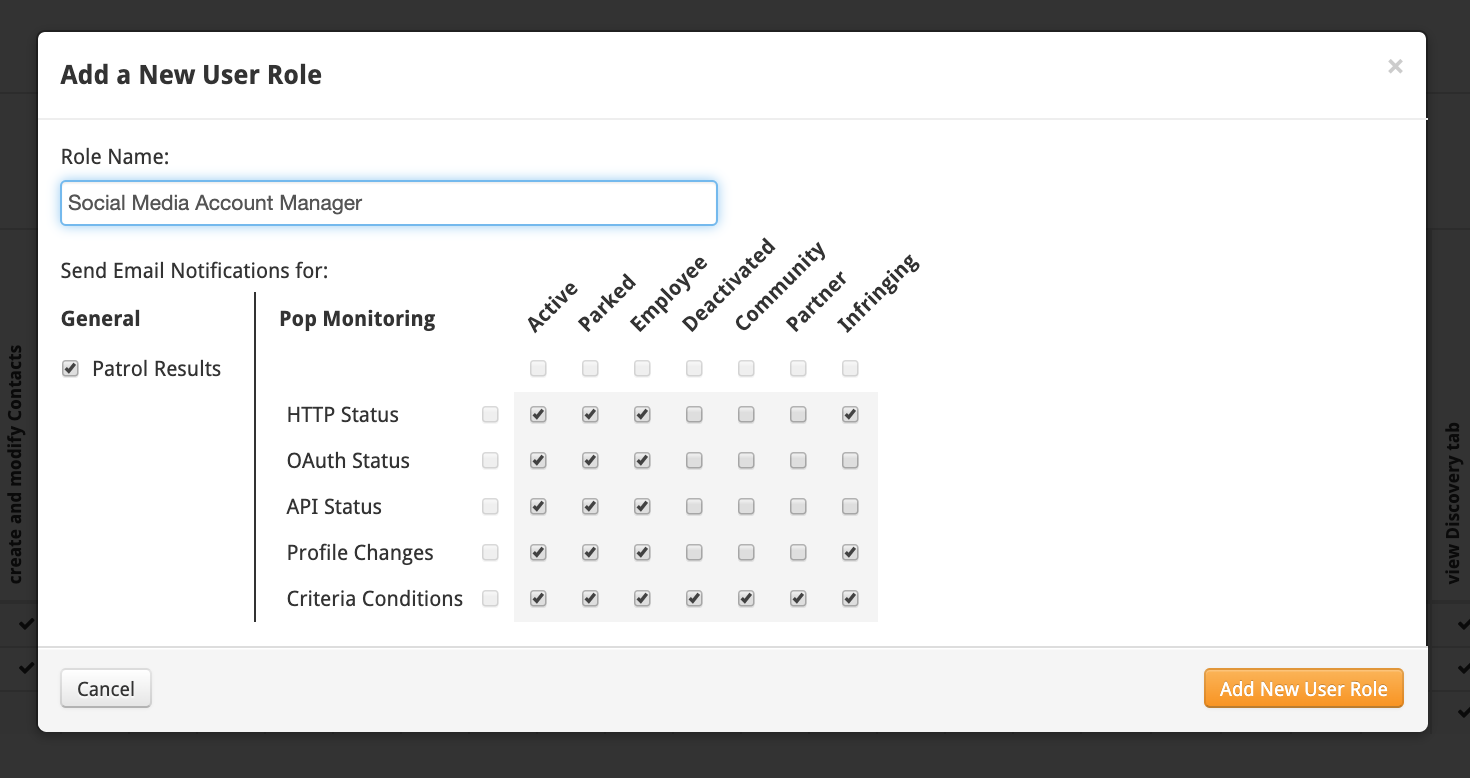
Title your Role (here we have Social Media Account Manager) and check the emails you wish this role to received. The General item is to receive emails about what Brandle discovers from Brand Patrol. The POP Monitoring are for different types of monitoring alerts in the monitoring emails.
Once created, these roles will be options for your Team Members and you can either alter a User to a specific Role or invite new users with a specific role.
Setting Permissions
Once you have titled the Role Name, it is time to set the Permissions for that Role. The Permissions are at the top of the Team Role Table and you can view how each role's permissions are assigned.
To assign Permissions for a newly created Team Role, click the 3-bar action menu beside the Role Name and select Edit Role Permissions.
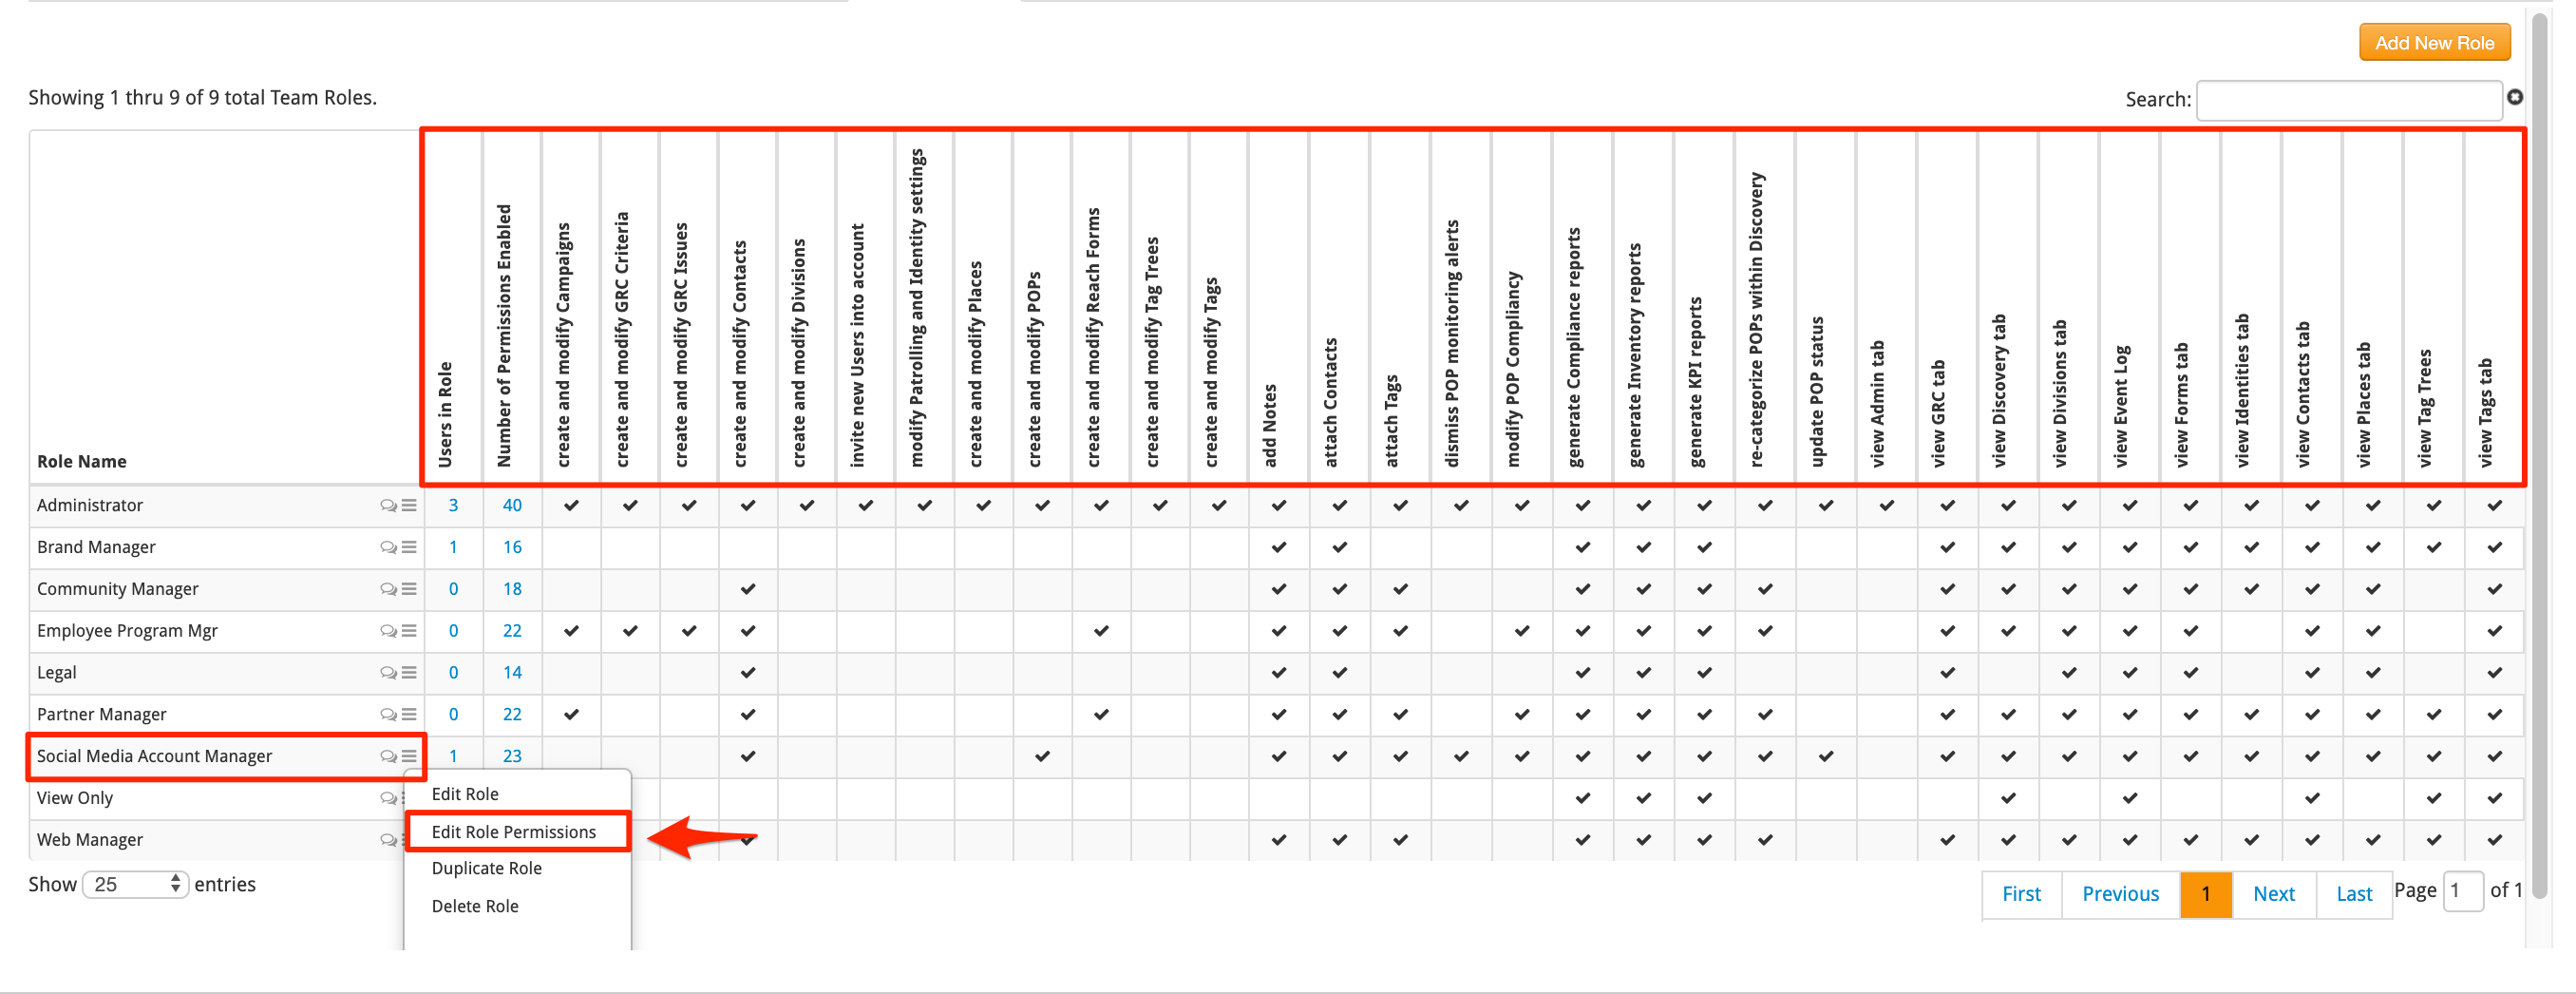
The Role Permissions box will present and you just click each permission you wish to enable for that role.
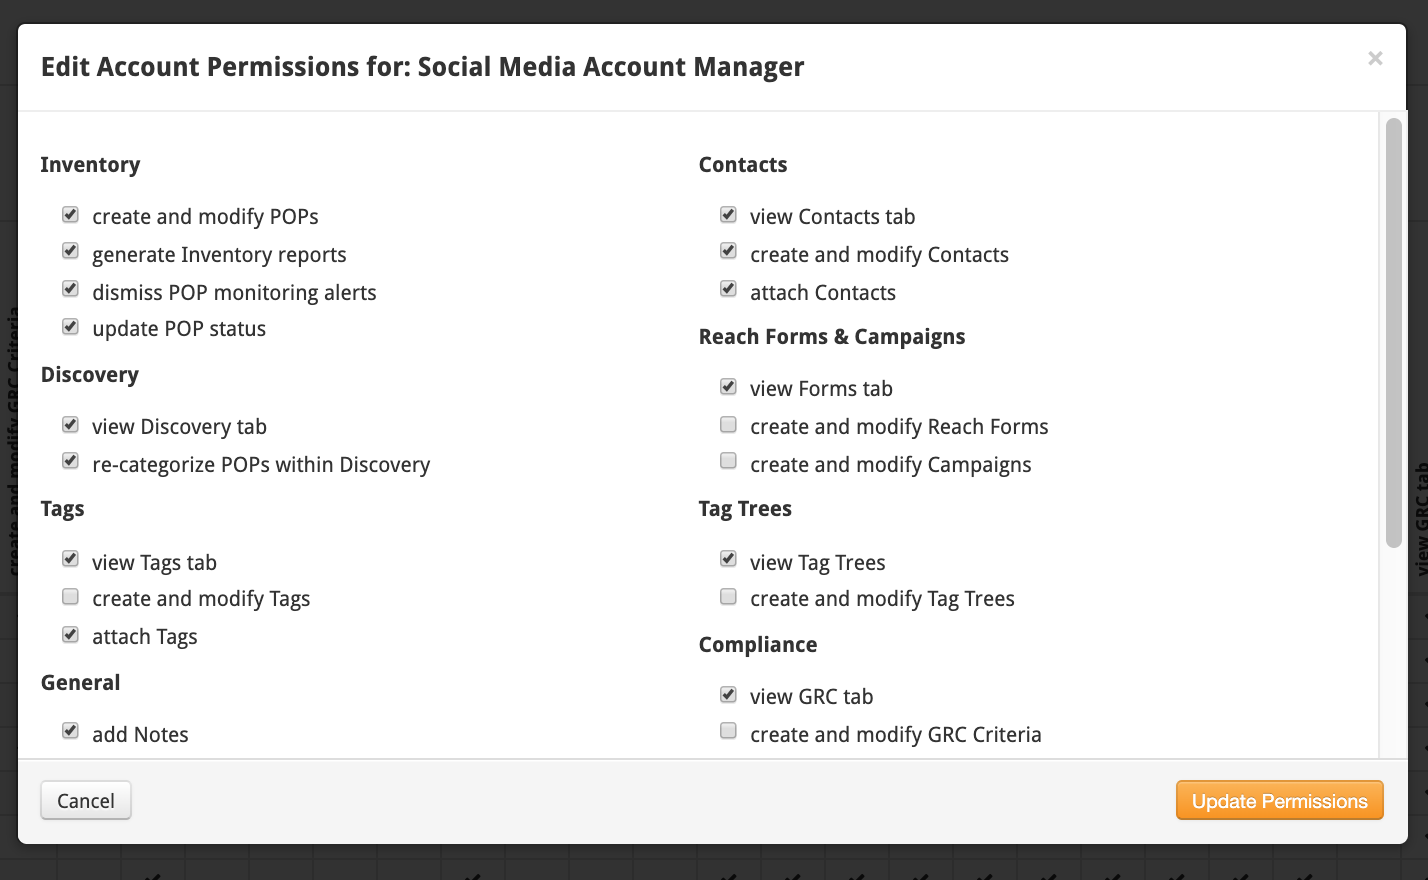
The new Permissions will be updated in the Role Table. You can always change the Role Permissions or Emails by changing your choices: Just click the 3-bar action menu beside the Role Name, select Edit Role or Edit Role Permissions, and make changes then Update.
Applying a Scope to a User
If you wish to apply a Scope to a particular user you apply that scope in the Account/Team tab. Go to the individual and select the pencil to edit Permissions Scope. Scoping is achieve by applying a Tag.
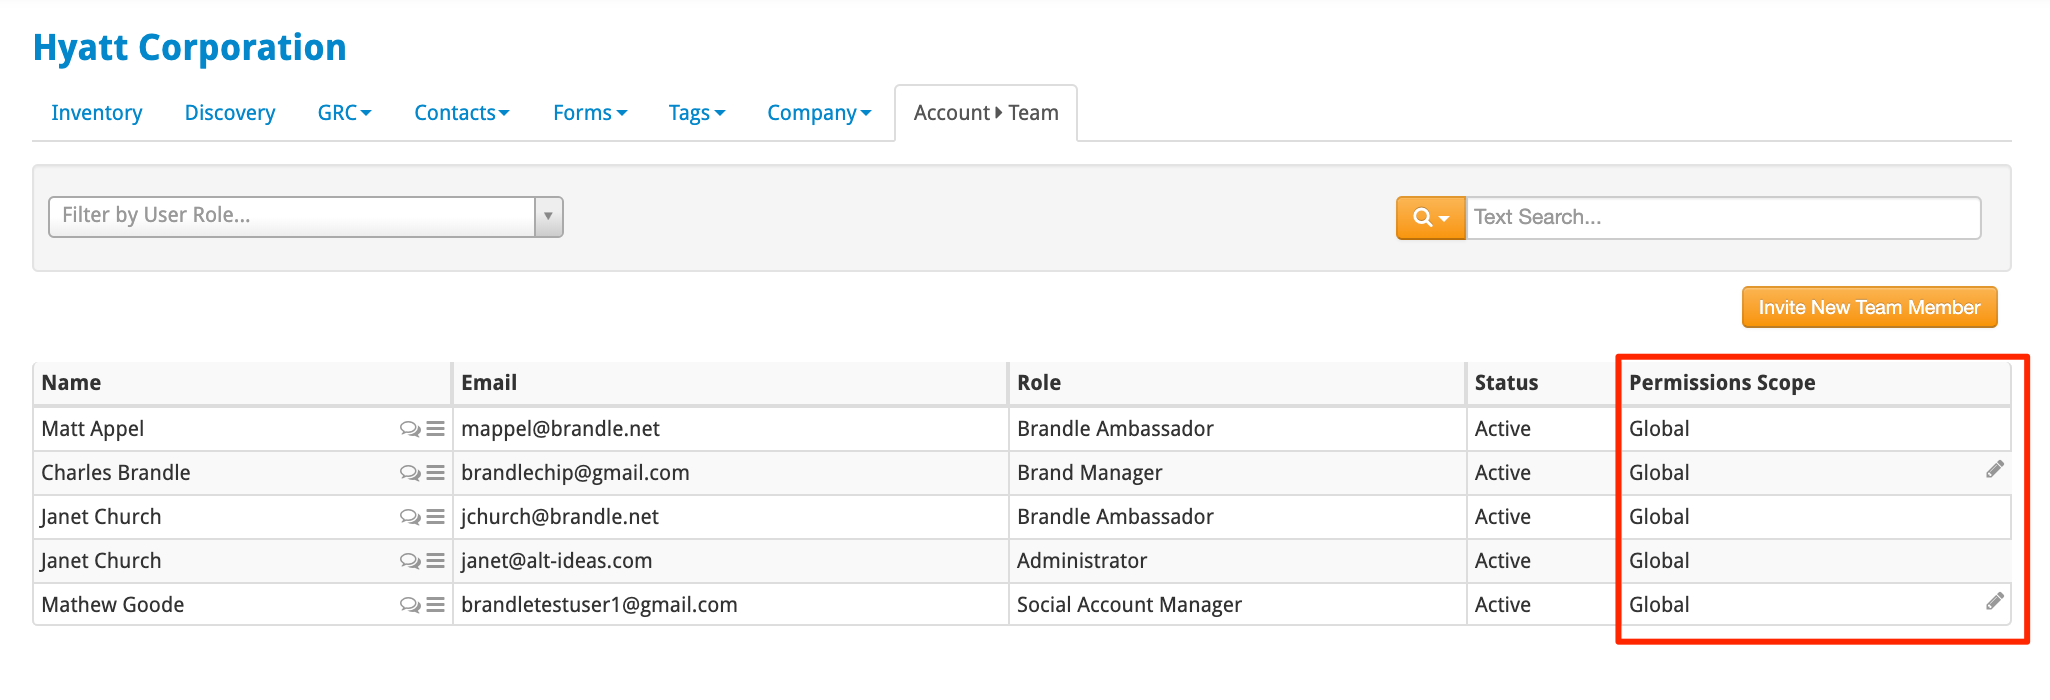
You may wish to apply a scope for a region, a country or a brand for that individual. Once applied, the user can only work on POPs that have that particular Tag associated.
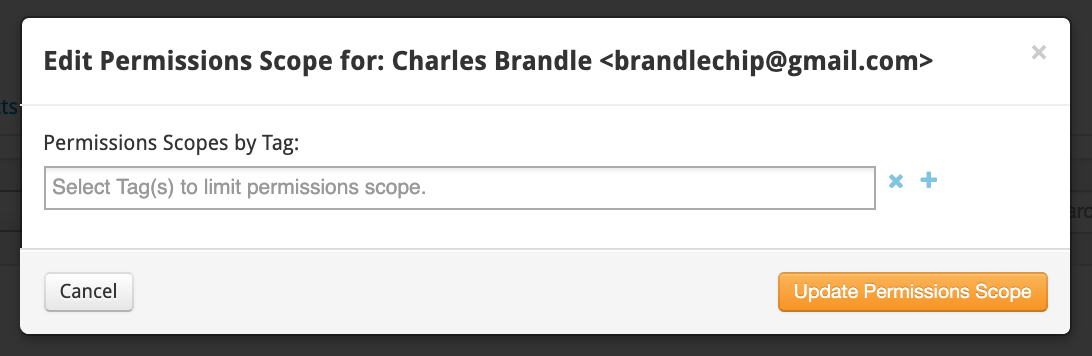
Be sure to click Update Permissions Scope.
If you choose to scope individuals, it becomes very critical to ensure accurate tagging of all of your POPS to ensure each team member can perform the work assigned.
Comments
0 comments
Please sign in to leave a comment.